FastAPI を使ってWEBアプリを作ってみる その8
前回の投稿ではユーザーのパスワードを暗号化して保存するように変更しより本番環境に適したロジックに再実装し、JWTを利用して認証機能を構築しました。
この投稿では保護された、認証が必要なエンドポイントを実装していきます。
過去の投稿はこちらから辿ることができます。
| FastAPI を使ってWEBアプリを作ってみる その1 | FastAPIとDockerでHelloWorld |
| FastAPI を使ってWEBアプリを作ってみる その2 | AlembicとPostgreSQLでDB Migrate |
| FastAPI を使ってWEBアプリを作ってみる その3 | APIエンドポイントをPostgreSQLに接続 |
| FastAPI を使ってWEBアプリを作ってみる その4 | PytestとDockerでテスト構築 |
| FastAPI を使ってWEBアプリを作ってみる その5 | RESTAPIエンドポイントを実装 |
| FastAPI を使ってWEBアプリを作ってみる その6 | ユーザーモデルの作成 |
| FastAPI を使ってWEBアプリを作ってみる その7 | パスワードの暗号化とJWT認証 |
| FastAPI を使ってWEBアプリを作ってみる その8 | 今ここ |
認証フロー
実装に入る前に基本的な認証フローについて確認します。
FastAPI ドキュメント にはセキュリティセクションがあり次のような説明をしています:
- ユーザーはフロントエンドでユーザー名とパスワードを入力しEnterキーを押下
- フロントエンドはそのユーザー名とパスワードを API の特定の URL に送信
API はユーザー名とパスワードをチェックし「トークン」で応答 - 「トークン」はユーザーを確認するために後で使用することができる文字列
- 通常、トークンは時間が経つと失効するように設定される
- 期限が切れるとユーザーは再度ログインしなければならない
- フロントエンドは返されたトークンを一時的にどこかに保存する
- ユーザーがフロントエンドでウェブアプリの別セクションに移動した場合、APIからデータを取得する必要がある
- APIで認証するためにヘッダのAuthorizationにBearerの値とトークンを加えたものを送信
- トークンにfoobarが含まれている場合、Authorizationヘッダーの内容は次のようになります。Bearer foobar
以上の内容をベースに実装していきます。
ログインエンドポイントのテスト作成
まずはユーザ操作のテストを作っていきましょう:
...省略

class TestUserLogin:
    async def test_user_can_login_successfully_and_receives_valid_token(
        self, app: FastAPI, client: AsyncClient, test_user: UserInDB,
    ) -> None:
        client.headers["content-type"] = "application/x-www-form-urlencoded"
        login_data = {
            "username": test_user.email,
            "password": "nmomosissocute",
        }
        res = await client.post(
            app.url_path_for("users:login-email-and-password"), data=login_data
        )
        assert res.status_code == HTTP_200_OK
        token = res.json().get("access_token")
        creds = jwt.decode(
            token,
            str(SECRET_KEY),
            audience=JWT_AUDIENCE,
            algorithms=[JWT_ALGORITHM])
        assert "username" in creds
        assert creds["username"] == test_user.username
        assert "sub" in creds
        assert creds["sub"] == test_user.email

        assert "token_type" in res.json()
        assert res.json().get("token_type") == "bearer"

    @pytest.mark.parametrize(
        "credential, wrong_value, status_code",
        (
            ("email", "wrong@email.com", 401),
            ("email", None, 401),
            ("email", "notemail", 401),
            ("password", "wrongpassword", 401),
            ("password", None, 401),
        ),
    )
    async def test_user_with_wrong_creds_doesnt_receive_token(
        self,
        app: FastAPI,
        client: AsyncClient,
        test_user: UserInDB,
        credential: str,
        wrong_value: str,
        status_code: int,
    ) -> None:
        client.headers["content-type"] = "application/x-www-form-urlencoded"
        user_data = test_user.dict()
        user_data["password"] = "nmomosissocute"
        user_data[credential] = wrong_value
        login_data = {
            "username": user_data["email"],
            "password": user_data["password"],
        }
        res = await client.post(
            app.url_path_for("users:login-email-and-password"), data=login_data
        )
        assert res.status_code == status_code
assert "access_token" not in res.json()まず最初にユーザーはメールとパスワードをJSONではなくフォームデータとしてログインポイントに送信します(ココで説明されている “username “と “password “キーを使用)
したがって、両方のテストでは、JSON の代わりにフォームデータを受け入れるように content-type ヘッダを更新しています。
これは前述した OAuth2 の仕様に一致させるためで、後ほど説明する FastAPI のインポートを使用するためにも必要です。
最初のテストでは、
- レスポンスが有効であること
- レスポンスに有効なトークンが含まれていること
- トークンがテストユーザーの正しいユーザー名と電子メールをエンコードしていること
の3つを確認します。
2 番目のテストではこれらのいずれかが正しくない場合は適切なステータスコードとトークンが取得されないことを確認します。
ちなみに両方とも httpx clientでデータを送信するときにこれまでの json パラメータを使用せずにdataパラメータを使用していますがこれはdataパラメータがhttpxでフォームデータを送信するためのパラメータだからです。
いつも通り、この状態でテストを実行すると失敗するのでログインエンドポイントを実装しましょう。
ログインエンドポイントの実装
まずはログインルートから始めます:
...省略

from fastapi import APIRouter, Body, Depends, HTTPException, status  # 更新
from fastapi.security import OAuth2PasswordRequestForm  # 追加

...省略

@router.post("/login/token/", response_model=AccessToken,
             name="users:login-email-and-password")
async def user_login_with_email_and_password(
    user_repo: UsersRepository = Depends(get_repository(UsersRepository)),
    form_data: OAuth2PasswordRequestForm = Depends(OAuth2PasswordRequestForm),
) -> AccessToken:
    user = await user_repo.authenticate_user(
        email=form_data.username, password=form_data.password
    )
    if not user:
        raise HTTPException(
            status_code=status.HTTP_401_UNAUTHORIZED,
            detail="Authentication was unsuccessful.",
            headers={"WWW-Authenticate": "Bearer"},
        )
    access_token = AccessToken(
        access_token=auth_service.create_access_token_for_user(
            user=user), token_type="bearer")
    return access_token
ログインルートは登録ルートと非常に似ていますが今回はUsersRepositoryのauthenticate_userメソッドを使用し送信されたログイン認証情報の有効性をチェックしています。
ユーザを取得できなかった場合は HTTP_401_UNAUTHORIZED を発生させ、取得できた場合はユーザ情報をエンコードしアクセストークンを送り返します。
次に、authenticate_userメソッドに進みます:
from typing import Optional

...省略

class UsersRepository(BaseRepository):
    ...省略

    async def authenticate_user(
        self, *, email: EmailStr, password: str
    ) -> Optional[UserInDB]:

        user = await self.get_user_by_email(email=email)
        if not user:
            return None

        if not self.auth_service.verify_password(
                password=password, salt=user.salt, hashed_pw=user.password):
            return None
        return user
送信されたメールアドレスを持つユーザーがデータベースに存在するかどうかを確認します。
存在しない場合はNoneを返し、見つかった場合はユーザが入力したパスワードをソルトでハッシュ化し、保存されているハッシュ化されたパスワードと一致するかどうかを検証するために auth_service を使用します。
正常に一致した場合はユーザを返します。
テストを実行すると400エラーが表示されます。
FastAPIの OAuth2PasswordRequestForm のbodyを解析するには python-multipart ライブラリが必要ですがインストールしていないのでインストールしましょう:
fastapi==0.63.0
uvicorn==0.13.4
pydantic==1.7.3
email-validator==1.1.2
python-multipart==0.0.5  # 追加

databases[postgresql]==0.4.1
SQLAlchemy==1.3.23
alembic==1.5.5
psycopg2==2.8.6

pyjwt==2.0.1
passlib[bcrypt]==1.7.4

pytest==6.2.2
pytest-asyncio==0.14.0
httpx==0.16.1
asgi-lifespan==1.0.1
docker==4.4.4
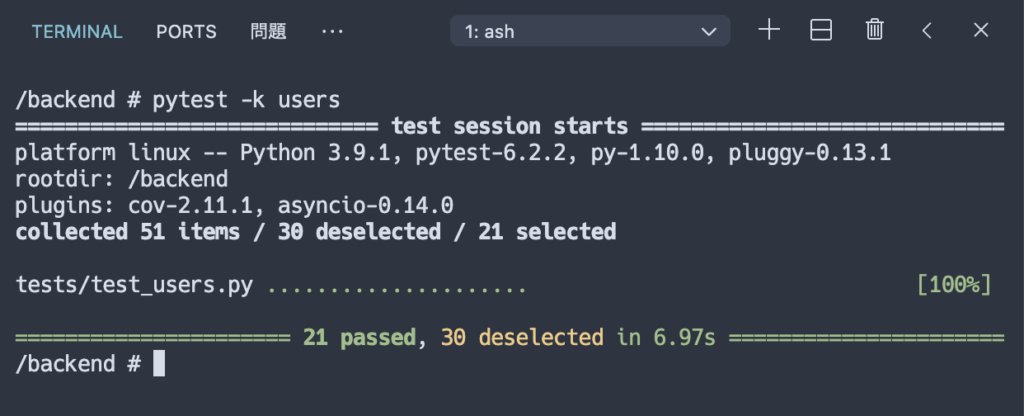
追記したら`docker-compose up –build`を実行しコンテナをビルドしたらテストを再度実行し全てパスすることを確認してください。

認証機能の依存関係化
エンドポイントを保護するために認証ロジックを抽象化するauth.py Dependenciesを作成しましょう
まずFastAPIのドキュメントを参考にし現在サインインしているユーザーを返す /me/ ルートを定義します。
このルートは auth Dependenciesを使用して
- トークンが Authorization ヘッダーに含まれていること
- トークンが有効であること
を確認します。
有効であればトークンでエンコードされたユーザを返します。
それではいつものようにテストから作成します、認可されたリクエストを行うための新しいフィクスチャを実装していきます:
...省略
from app.core.config import SECRET_KEY, JWT_TOKEN_PREFIX
from app.services import auth_service
...省略

@pytest.fixture
def authorized_client(client: AsyncClient, test_user: UserInDB) -> AsyncClient:
    access_token = auth_service.create_access_token_for_user(user=test_user, secret_key=str(SECRET_KEY))
    client.headers = {
        **client.headers,
        "Authorization": f"{JWT_TOKEN_PREFIX} {access_token}",
    }
    return client
authorized_client フィクスチャはテストユーザ用のトークンを取得しテストリクエストのAuthorization ヘッダに追加します。
これで保護されたエンドポイントに対するリクエストをテストしたいときは以前作成したスタンダードなclientフィクスチャの代わりに authorized_client フィクスチャを使いわけることができるようになりました。
このフィクスチャを利用し TestAuthToken クラスにいくつかのテストを追加します:
class TestAuthTokens:
    # ...other code

    async def test_can_retrieve_username_from_token(
        self, app: FastAPI, client: AsyncClient, test_user: UserInDB
    ) -> None:
        token = auth_service.create_access_token_for_user(
            user=test_user, secret_key=str(SECRET_KEY))
        username = auth_service.get_username_from_token(
            token=token, secret_key=str(SECRET_KEY))
        assert username == test_user.username

    @pytest.mark.parametrize(
        "secret, wrong_token",
        (
            (SECRET_KEY, "asdf"),
            (SECRET_KEY, ""),
            (SECRET_KEY, None),
            ("ABC123", "use correct token")
        )
    )
    async def test_error_when_token_or_secret_is_wrong(
        self,
        app: FastAPI,
        client: AsyncClient,
        test_user: UserInDB,
        secret: Union[Secret, str],
        wrong_token: Optional[str],
    ) -> None:
        token = auth_service.create_access_token_for_user(
            user=test_user, secret_key=str(SECRET_KEY))

        if wrong_token == "use correct token":
            wrong_token = token

        with pytest.raises(HTTPException):
            username = auth_service.get_username_from_token(
                token=wrong_token, secret_key=str(secret))
まず最初に認証サービスが有効な JWT トークンからユーザ名を抽出できるかどうかをテストしています。
次にトークンやシークレットが間違っている場合に HTTPException を発生させることを確認します。
テストを実行して失敗することを確認してください。
get_username_from_token メソッドを実装していないので用意します:
...省略

from typing import Optional
from fastapi import HTTPException, status
from pydantic import ValidationError

...省略

class AuthService:
    ...省略

    def get_username_from_token(self, *, token: str, secret_key: str) -> Optional[str]:
        try:
            decoded_token = jwt.decode(token, str(secret_key), audience=JWT_AUDIENCE, algorithms=[JWT_ALGORITHM])
            payload = JWTPayload(**decoded_token)
        except (jwt.PyJWTError, ValidationError):
            raise HTTPException(
                status_code=status.HTTP_401_UNAUTHORIZED,
                detail="Could not validate token credentials.",
                headers={"WWW-Authenticate": "Bearer"},
            )
        return payload.username
もう一度テストを実行すると今度はすべて合格するはずです。
このコードは渡されたトークンのデコードに問題があった場合は HTTPException を発生させているだけです。
それでは保護されたエンドポイントを作成するためのテストコードを書いていきます:
from app.models.user import UserPublic

...省略

class TestUserMe:
    async def test_authenticated_user_can_retrieve_own_data(
        self, app: FastAPI, authorized_client: AsyncClient, test_user: UserInDB,
    ) -> None:
        res = await authorized_client.get(app.url_path_for("users:get-current-user"))
        assert res.status_code == HTTP_200_OK
        user = UserPublic(**res.json())
        assert user.email == test_user.email
        assert user.username == test_user.username
        assert user.id == test_user.id

    async def test_user_cannot_access_own_data_if_not_authenticated(
        self, app: FastAPI, client: AsyncClient, test_user: UserInDB,
    ) -> None:
        res = await client.get(app.url_path_for("users:get-current-user"))
        assert res.status_code == HTTP_401_UNAUTHORIZED

    @pytest.mark.parametrize(
        "jwt_prefix",
        (
            ("",),
            ("value",),
            ("Token",),
            ("JWT",),
            ("Swearer",)
        )
    )
    async def test_user_cannot_access_own_data_with_incorrect_jwt_prefix(
        self, app: FastAPI, client: AsyncClient, test_user: UserInDB, jwt_prefix: str,
    ) -> None:
        token = auth_service.create_access_token_for_user(
            user=test_user, secret_key=str(SECRET_KEY))
        res = await client.get(
            app.url_path_for("users:get-current-user"),
            headers={"Authorization": f"{jwt_prefix} {token}"}
        )
        assert res.status_code == HTTP_401_UNAUTHORIZED
api/routes/users.py を開き、次のように /me/ 追加します:
...省略

@router.get("/me/", response_model=UserPublic, name="users:get-current-user")
async def get_currently_authenticated_user() -> UserPublic:
    return None
dependenciesディレクトリに新しいファイルを作成します:
$ touch /backend/app/api/dependencies/auth.pyfrom typing import Optional
from app.api.dependencies.database import get_repository
from app.core.config import API_PREFIX, SECRET_KEY
from app.db.repositories.users import UsersRepository
from app.models.user import UserInDB
from app.services import auth_service
from fastapi import Depends, HTTPException, status
from fastapi.security import OAuth2PasswordBearer
oauth2_scheme = OAuth2PasswordBearer(tokenUrl=f"{API_PREFIX}/users/login/token/")
async def get_user_from_token(
*,
token: str = Depends(oauth2_scheme),
user_repo: UsersRepository = Depends(get_repository(UsersRepository)),
) -> Optional[UserInDB]:
try:
username = auth_service.get_username_from_token(
token=token, secret_key=str(SECRET_KEY))
user = await user_repo.get_user_by_username(username=username)
except Exception as e:
raise e
return user
def get_current_active_user(current_user: UserInDB = Depends(
get_user_from_token)) -> Optional[UserInDB]:
if not current_user:
raise HTTPException(
status_code=status.HTTP_401_UNAUTHORIZED,
detail="No authenticated user.",
headers={"WWW-Authenticate": "Bearer"},
)
if not current_user.is_active:
raise HTTPException(
status_code=status.HTTP_401_UNAUTHORIZED,
detail="Not an active user.",
headers={"WWW-Authenticate": "Bearer"},
)
return current_user
OAuth2PasswordBearerはFastAPIからインポートするクラスで、ユーザーが認証できるようにメールアドレスとパスワードを送信するPathを渡すことでインスタンス化することができます。
このクラスは提供された URL がトークンを取得するために使用されるものであることを FastAPI に通知します。
oauth2_scheme変数は OAuth2PasswordBearer のインスタンスであり依存関係にもなっているので、Dependsと一緒に使うことができます。
get_user_from_token関数では依存関係としてoauth2_schemeを注入することで、FastAPIはAuthorizationヘッダーのリクエストを検査し値がBearerといくつかのトークンであるかどうかをチェックしトークンをstrとして返します。
Authorizationヘッダーが付与されていないか、値にBearerトークンがない場合は HTTP_401_UNAUTHORIZED で応答します。
トークンがget_user_from_token関数に注入されると、auth_serviceを使用してトークンをデコードしペイロードに含まれるユーザ名と一致するユーザをデータベースで検索します。
何か問題が発生した場合は例外を発生させ、それ以外の場合はユーザーを返します。
このget_user_from_token関数は、get_current_active_user関数のサブ依存関係として使用されます。
この依存関係は get_user_from_token関数によって返されたユーザを受け取り、そのユーザが存在しアクティブであることを保証します。
そうでなければ、適切な例外を発生させます。
api/routes/users.py ファイルに戻り /me/ エンドポイントを以下のように更新します:
...省略
from app.api.dependencies.auth import get_current_active_user
from app.models.user import UserCreate, UserUpdate, UserInDB, UserPublic
...省略

@router.get("/me/", response_model=UserPublic, name="users:get-current-user")
async def get_currently_authenticated_user(
    current_user: UserInDB = Depends(get_current_active_user)
) -> UserPublic:
    return current_user
これで全てのテストがパスするようになりました、試してみてください。
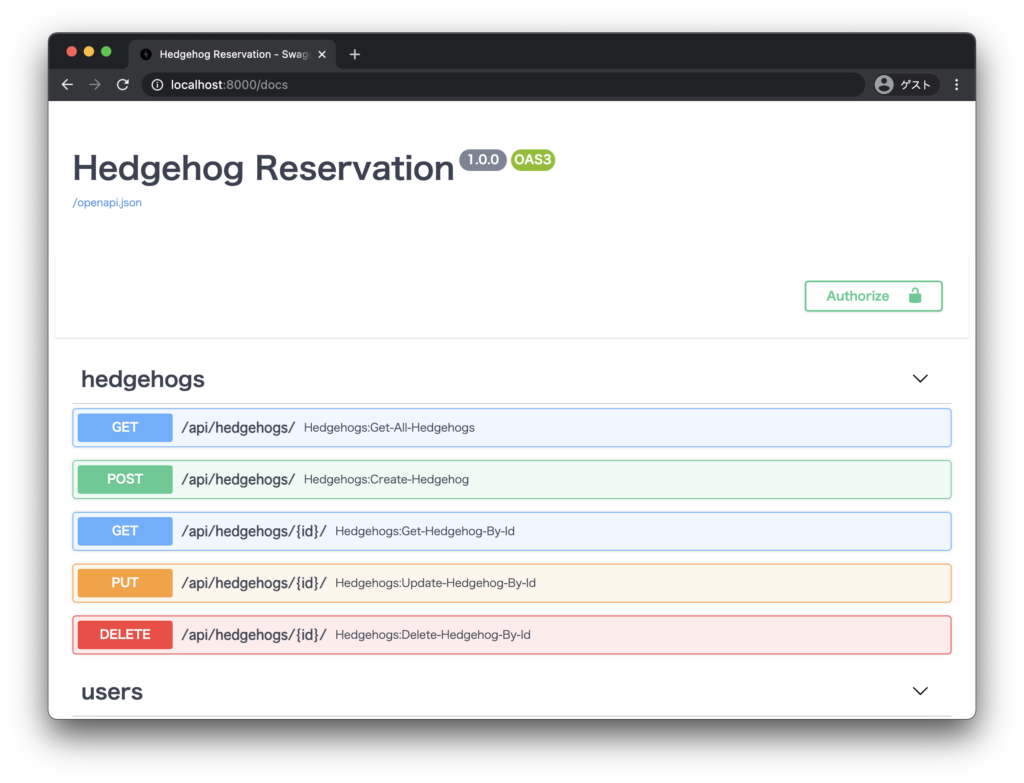
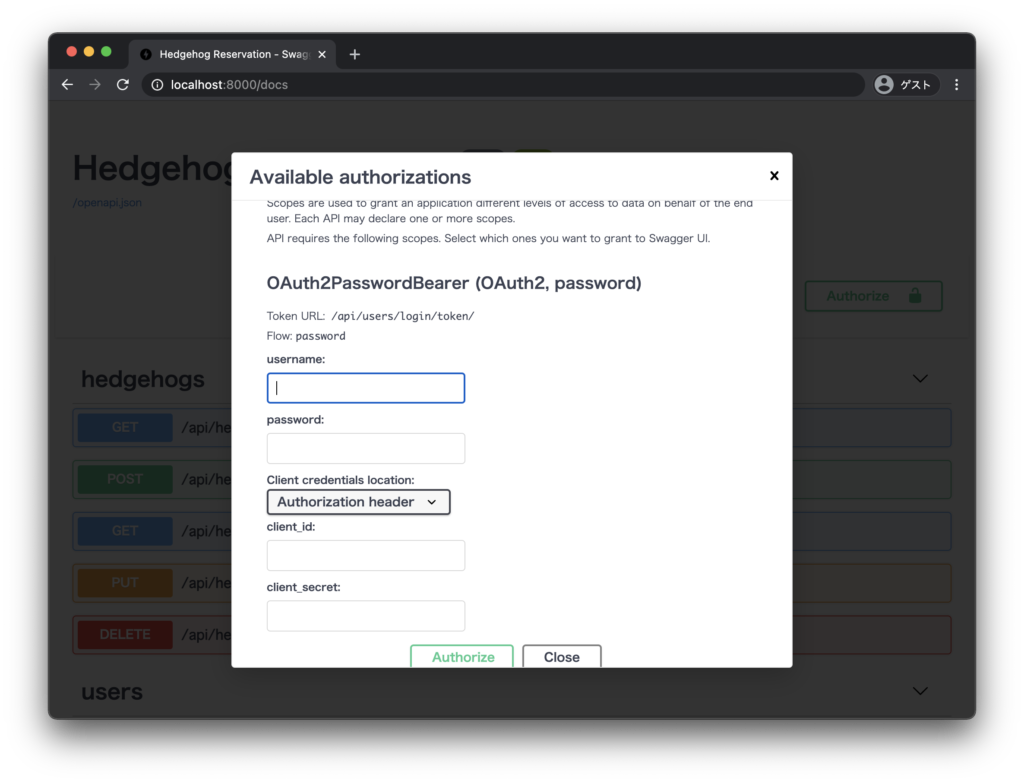
また、uvicornサーバを起動しdocs/にアクセスすると認証用のフィールドが生成されていることが確認できます。
実際にDBに作成したユーザの情報をここに入れる事でインタラクティブに挙動を確認することも可能です。


まとめ
今回の投稿では認証に使用する全てのロジックを実装し依存性として注入できるようにしました。
これでDBにユーザを追加し、認証し、ハリネズミさんを探して予約するための準備ができました。
次回の投稿ではサインアップしたユーザが自分のプロファイルをカスタマイズできるよう拡張していきます。
作成したコードはGitHubにアップしています。
part8ブランチが対応しています。


